D - Presentation of the sales screen
- 14 Mar 2023
- 5 Minutes to read
- Print
- DarkLight
- PDF
D - Presentation of the sales screen
- Updated on 14 Mar 2023
- 5 Minutes to read
- Print
- DarkLight
- PDF
Article Summary
Share feedback
Thanks for sharing your feedback!
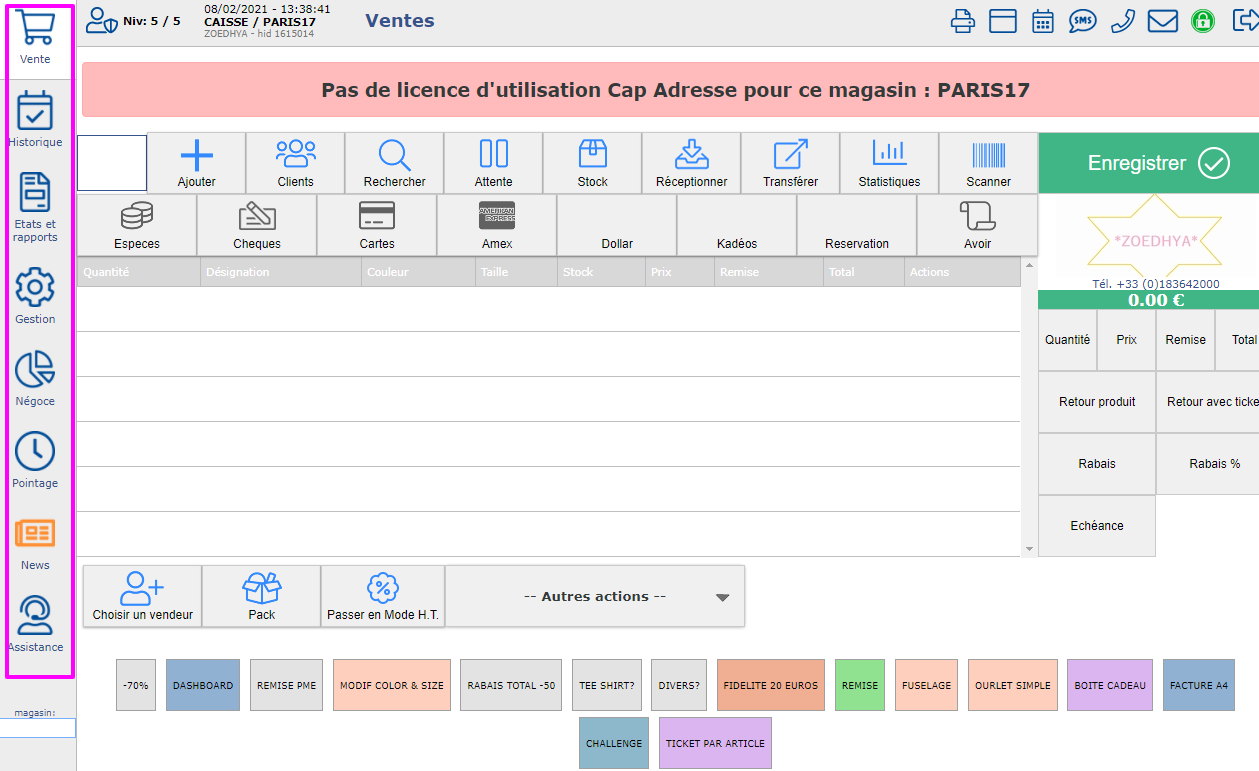
General presentation of the front office:
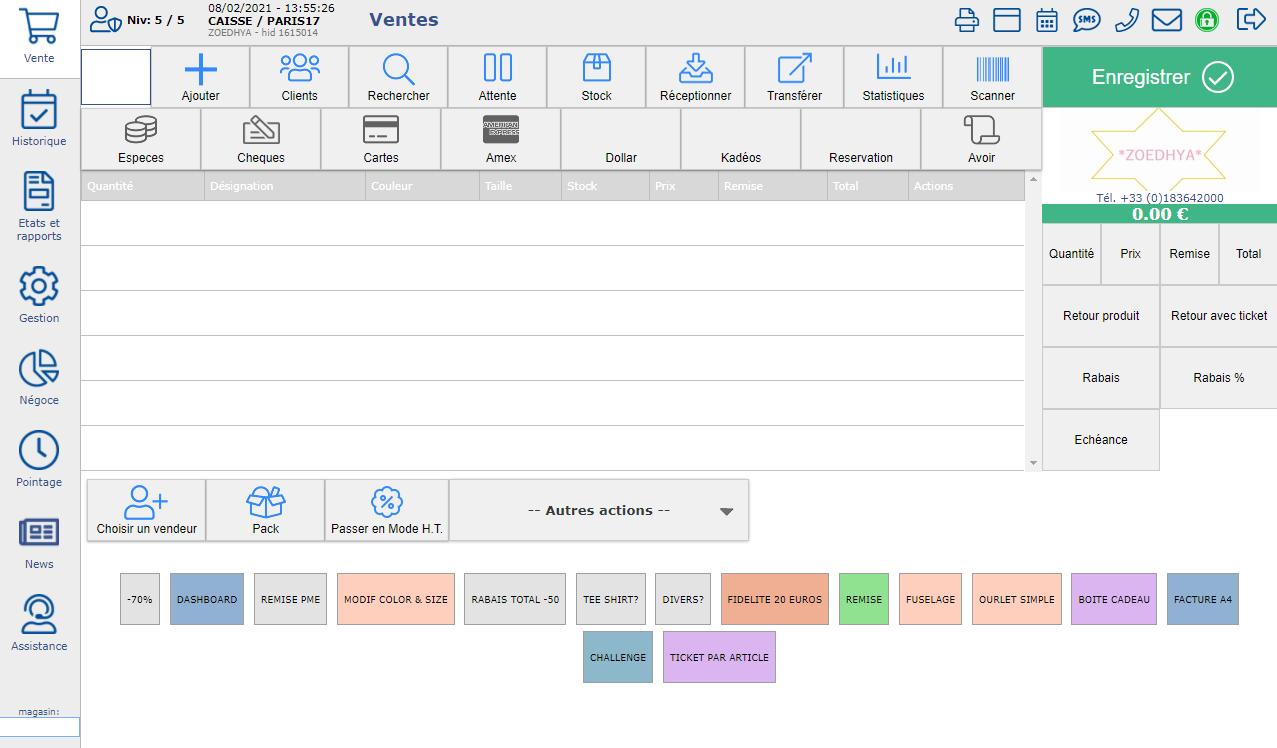
1. Information bar:

- The security level of the logged-in user.
- Date, time, Name of the logged-in user.
- Nature of the menu.
- Ability to disable printer, schedule, Block reporting statuses, send SMS, skype contacts, send lockers between stores, secure connection, disconnect from the store.
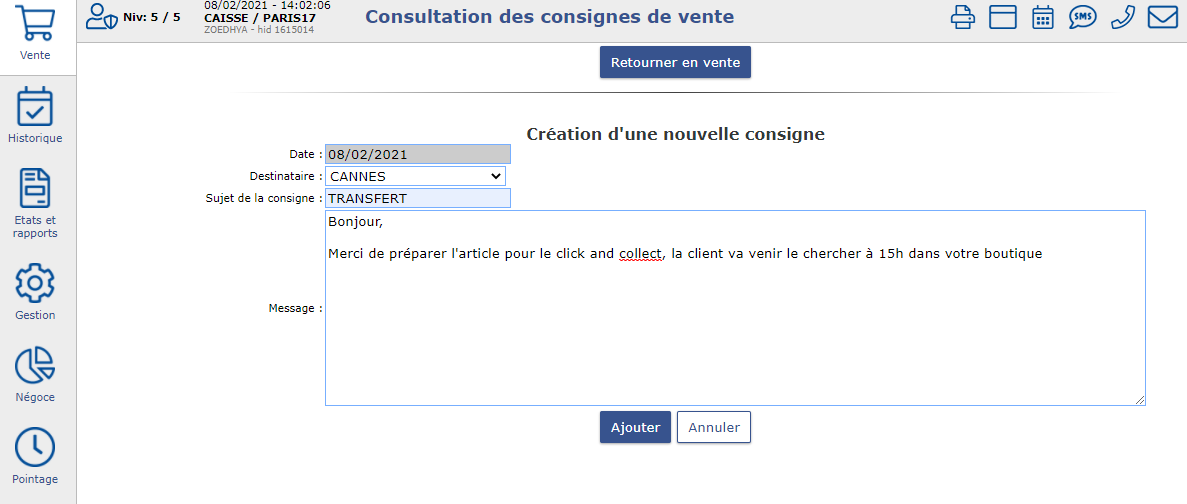
2. Send a deposit to another store of the brand:
Prerequisites : activate in the settings folder

Click on the envelope
Click on "Add a policy"
Choose a recipient = a user from the drop-down menu
Indicate the subject and the message then click on "Add "
Read a consignment (envelope flashes red)
Ability to hide previously read guidelines or select a page
Click on "Play"
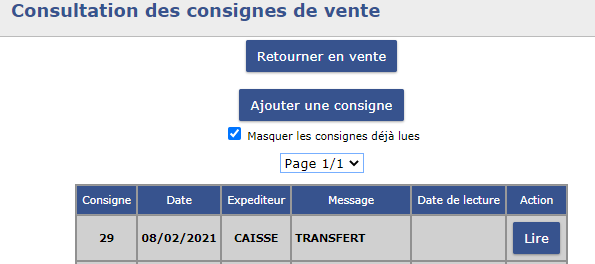
Possibility to print the instruction, respond to the instruction or return to the list of instructions.
3. Features available for sale:
To simplify your handling, we have prepared a tutoriel ultra pratique to introduce you to the features of the sales screen!
*Input box:
Allows you to manually enter a reference, a designation, an amount, a discount, and to beep a gencod
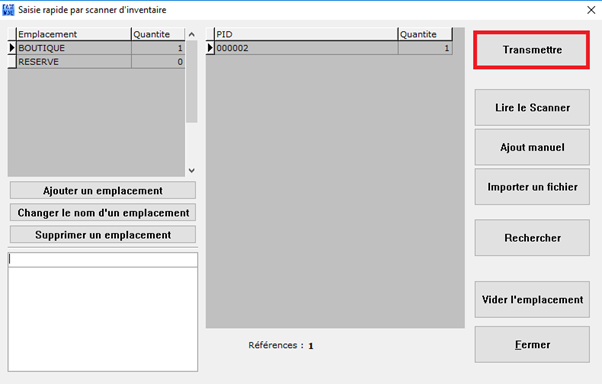
*Scanner:
Allows you to enter products quickly with an inventory scanner and create a shopping cart. This function is only accessible with the Fastmag application but not on a web page. The Zebex scanner must be set up beforehand by the hotline.
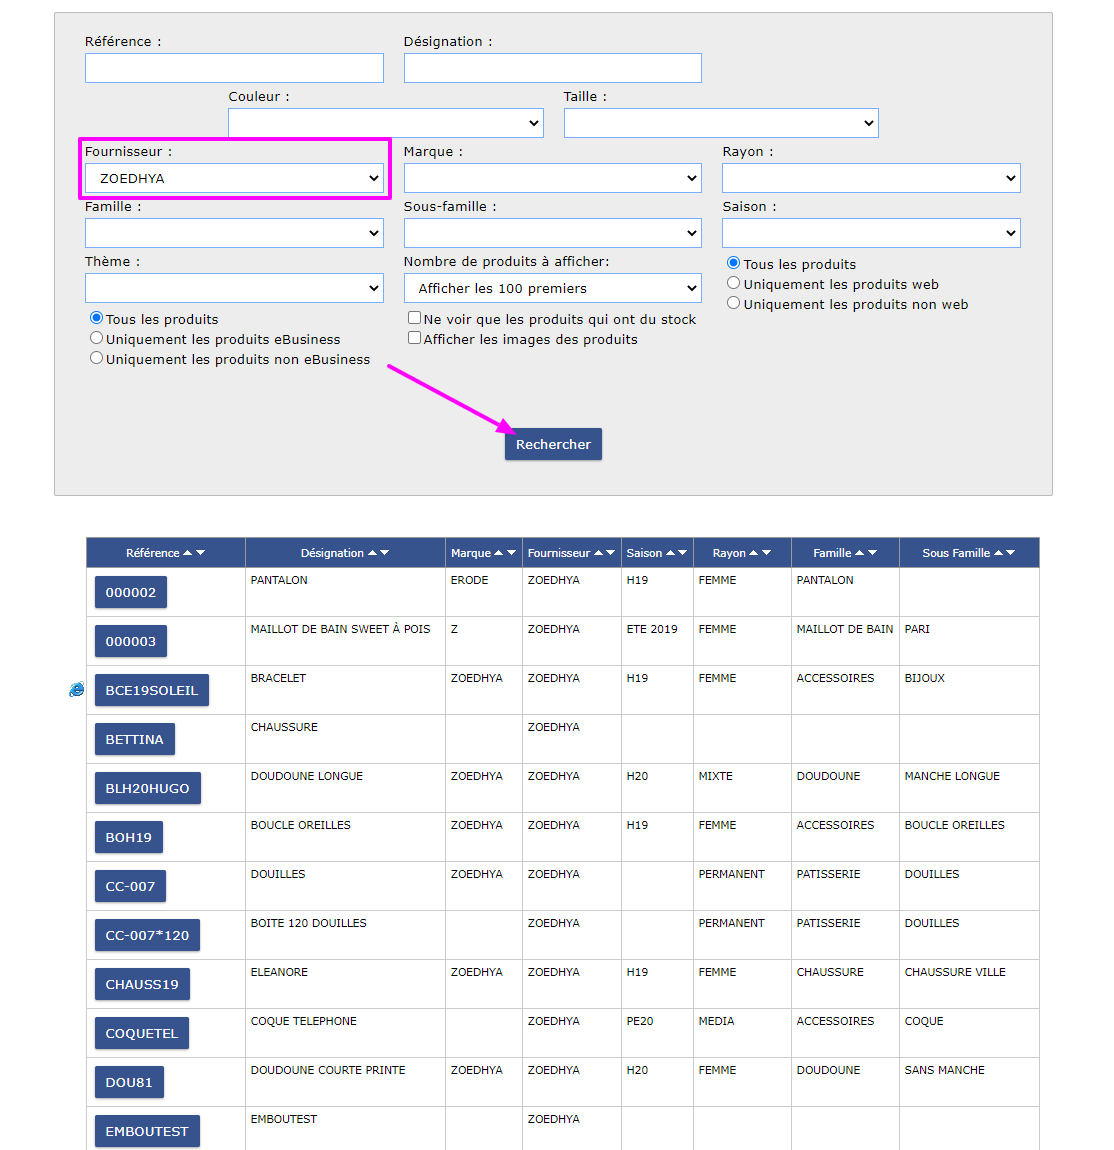
*Research:
Allows you to search for a multi-criteria product, example by its reference, designation, family, supplier, etc.
Ability to filter products that have stock, have a photo, etc. and then click on search.
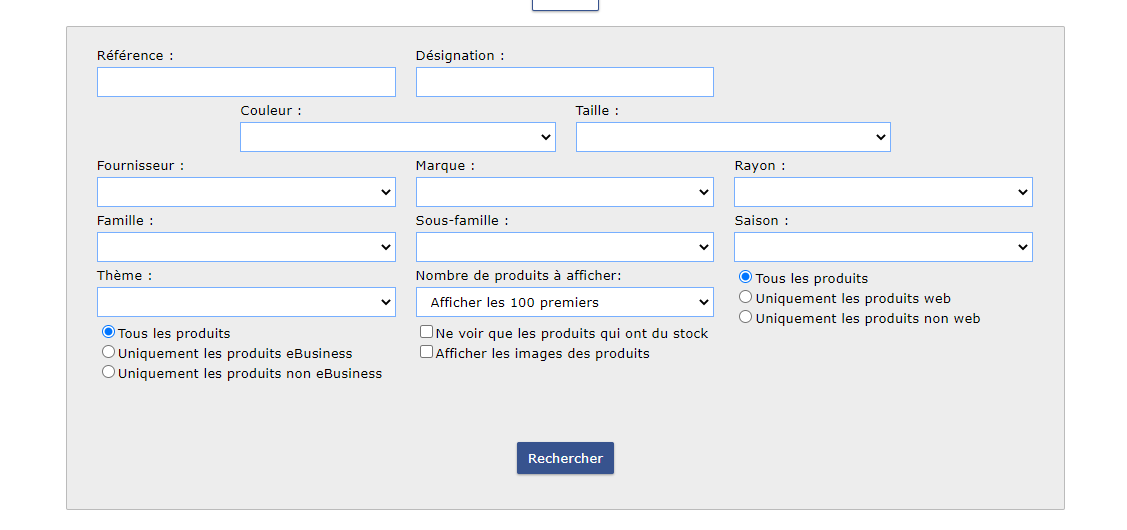
Example 1 : Search by supplier, all active products
Example 2 : Search filtered by supplier, visu of products that have a photo and stock in store (here I have a view of products with and without photos, this would allow me to locate the products or I have to insert photos).
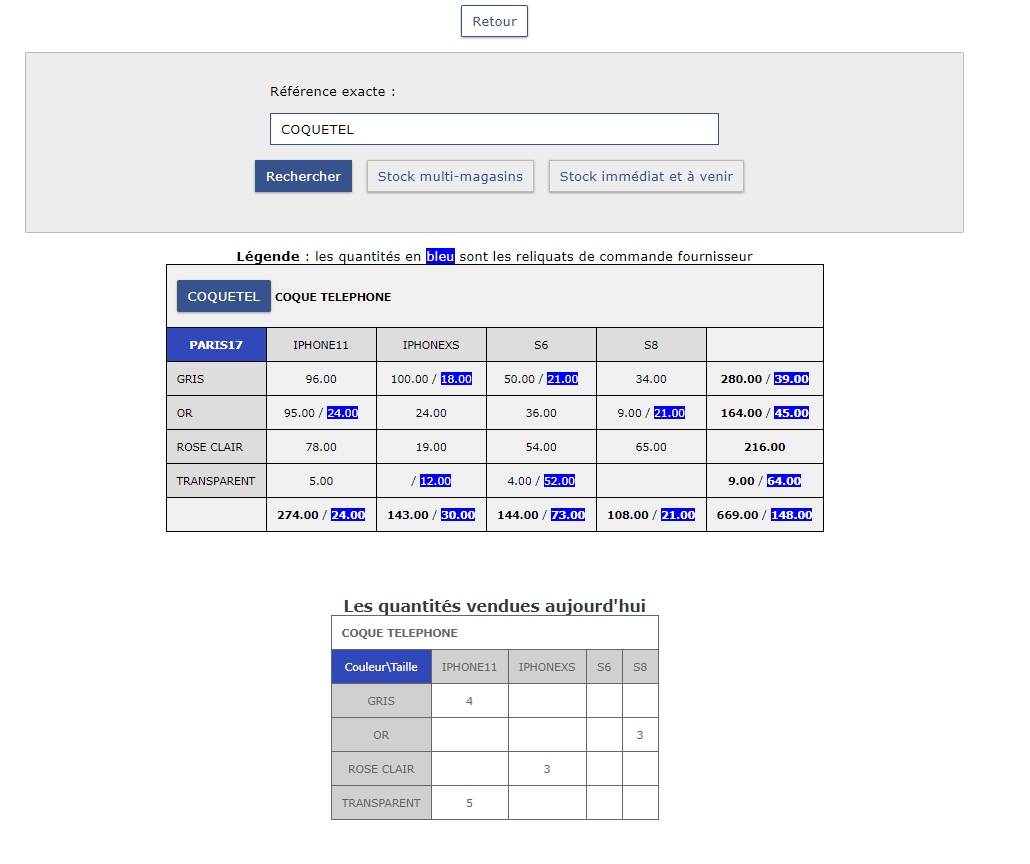
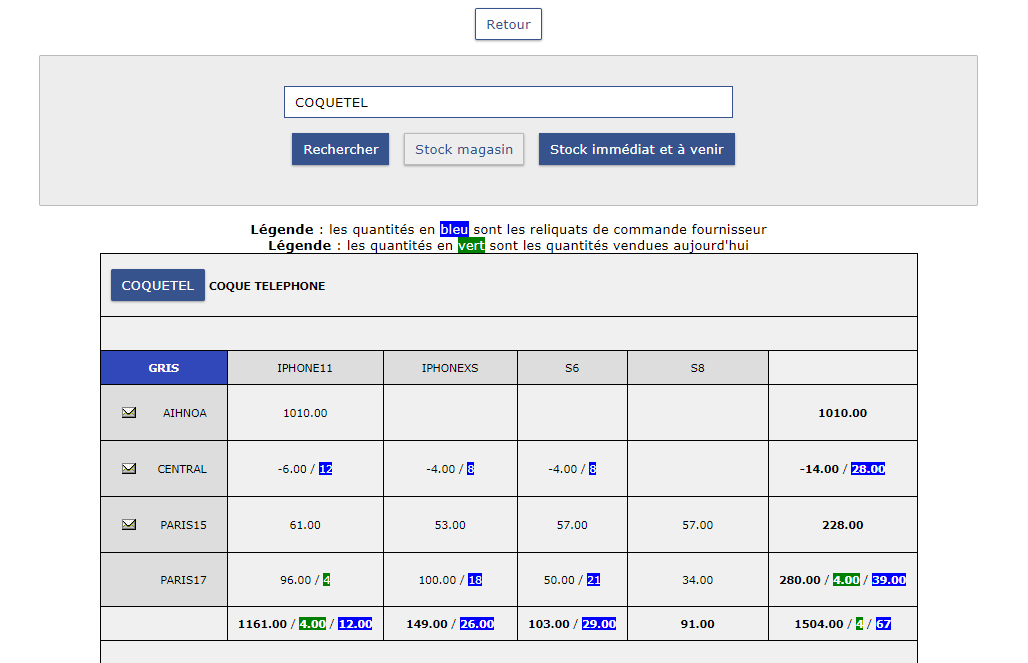
*Stock:

Allows you to consult the stock of the store for a reference and the multi-store stock (depending on the configuration in place I will be able to see, the quantities of the day sold, the balance of supplier orders if I manage my balances via the module in management).
Example 1 : Store stock
By clicking on the reference, possibility to add a product for sale.
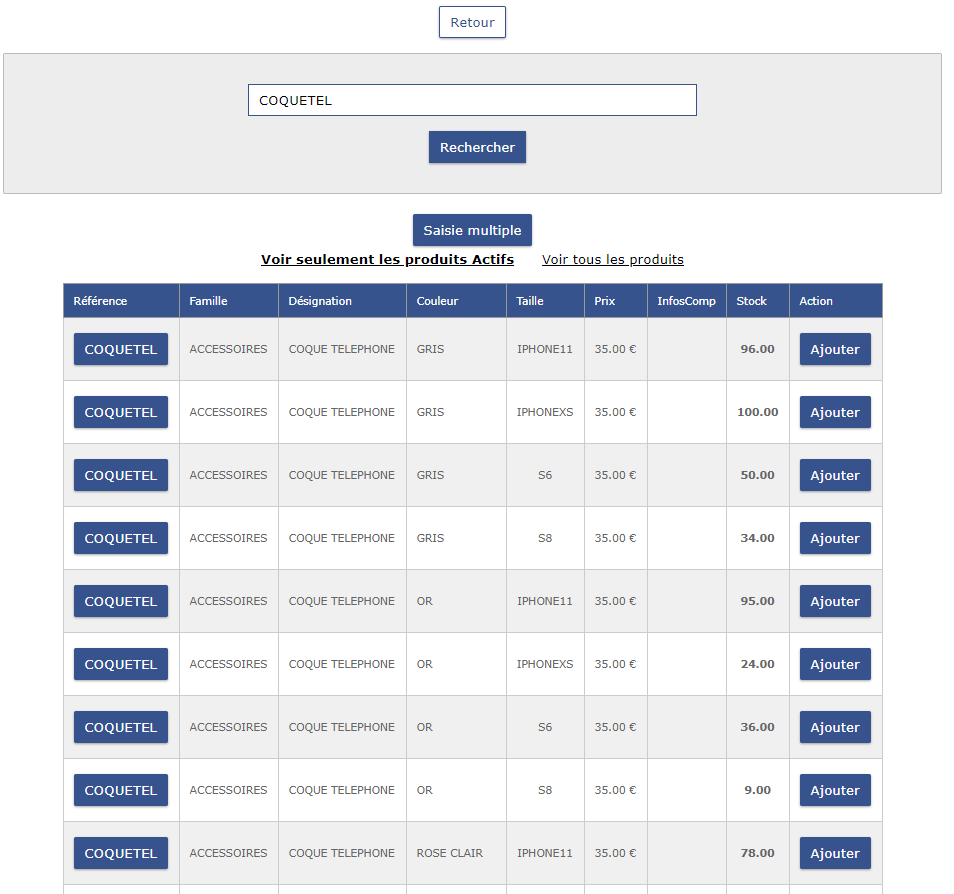
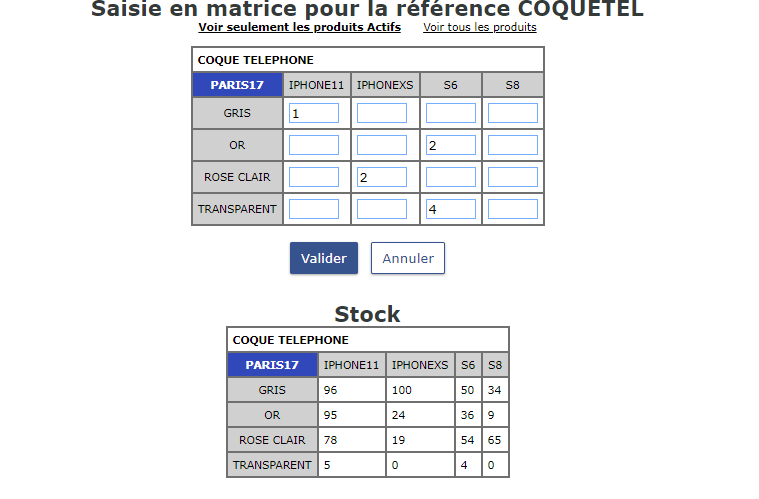
By clicking on "Multiple entry", possibility to fill in several products and recall them for sale at once, depending on the visual setting on the stock at the same time:
Example 2 : Multi-store stock
*Customers:

By clicking on "Client":
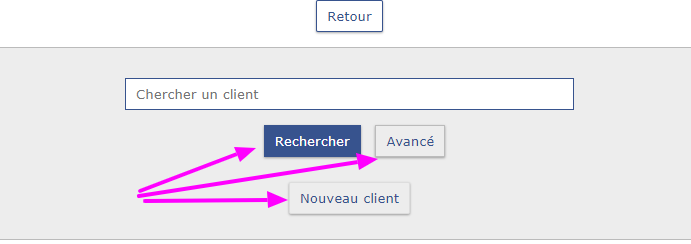
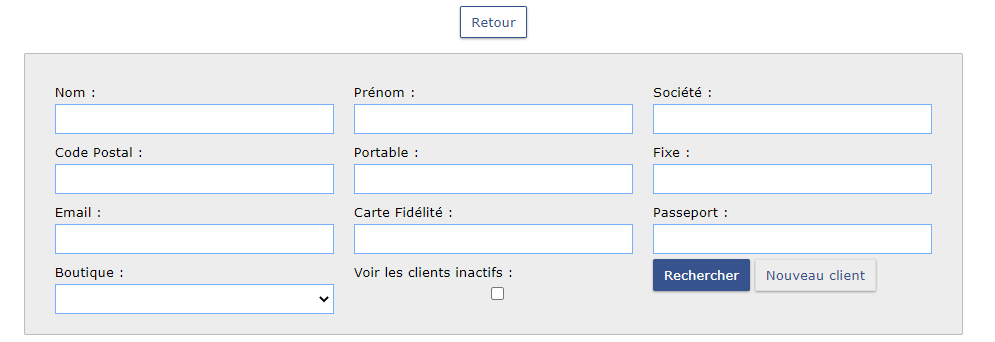
If I click on "advanced search", I get the following screen:
- New customer: Ability to create a new customer
- Name + Search: Search for a customer by name
- Advanced: search for it by many available criteria
We have the possibility in the setting, to force the shops to see that the advanced search
*Transfer:

Allows transfers between stores of the brand
- Beep products in the sales module
- Click on " Transfer"
- Select the store to which the transfer is sent
- Start printing the label (option)
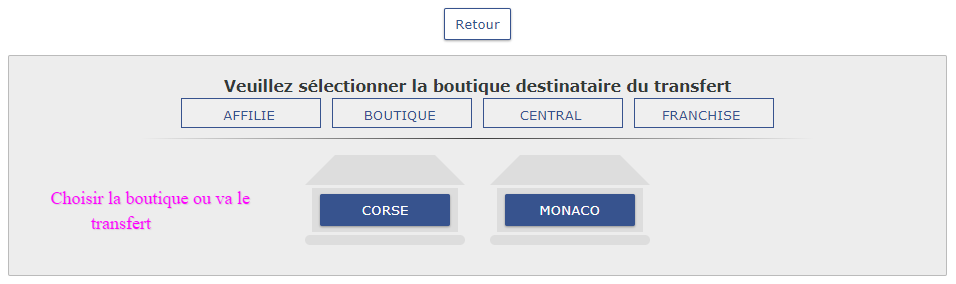
The product(s) are out of stock at the sending store. This action will create a pending receipt in the recipient store that he will have to receive to integrate it into stock.
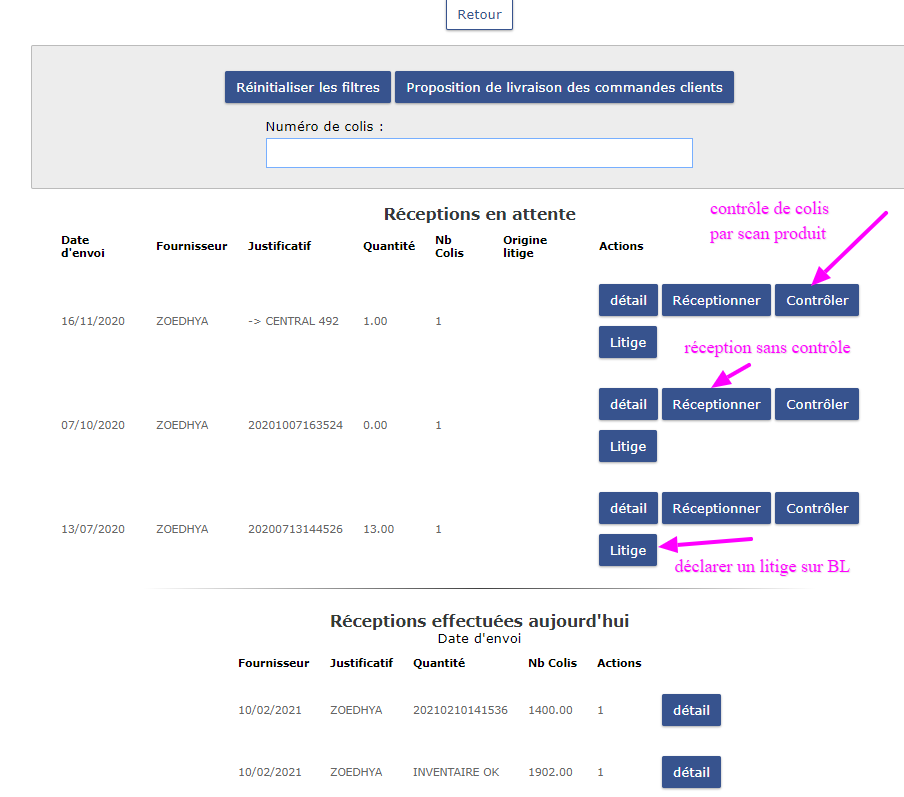
*Reception:

Allows you to receive goods from pending delivery notes, without displaying purchase prices. It is possible to modify the quantities (according to the store configuration), to edit the delivery note, to print the labels of the products.
The reception can also be done by asking the shops to scan each product received, this is the parcel control (configuration to be set up in the setting either of the sign or by store if the management is different from one to the other):
- Click on " Reception"
- Select the receipt to be processed in pending receipts by clicking on "Details",
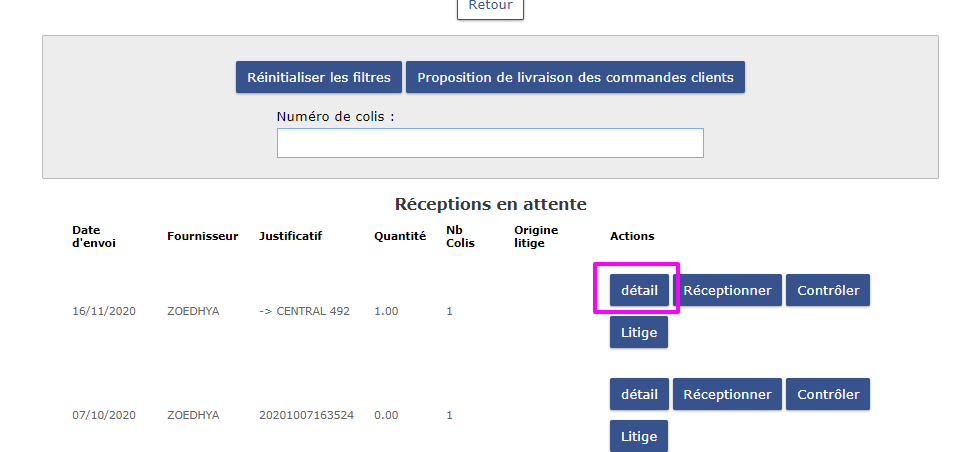
- Receive and integrate into stock
Careful:
From the moment the receipt is integrated into stock, it can no longer be modified.
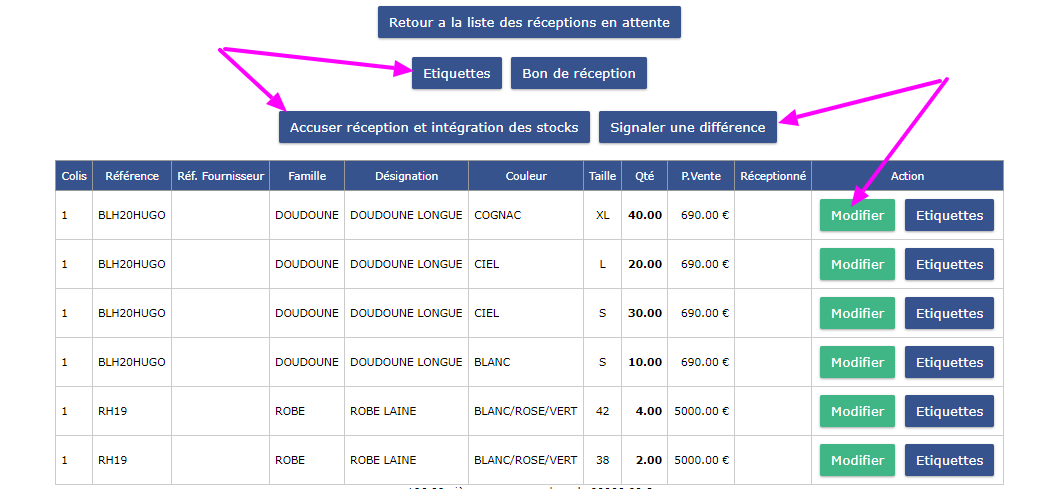
If I press "acknowledgement and integration of stocks":
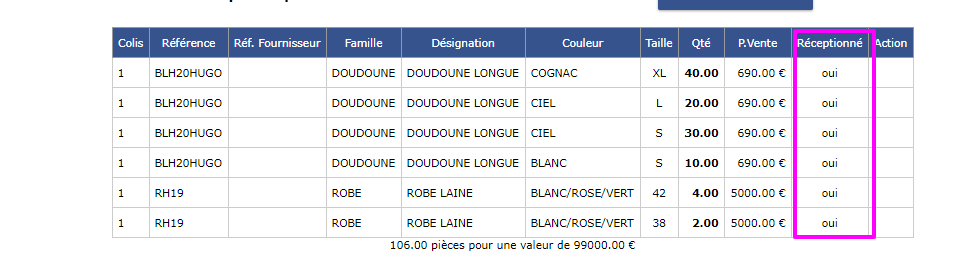
There are other possibilities depending on the settings in place:
4. Payment methods:
List of payment methods assigned to the store, It is possible at any time, to add and assign new payment methods in management, system settings, store settings, payment methods.

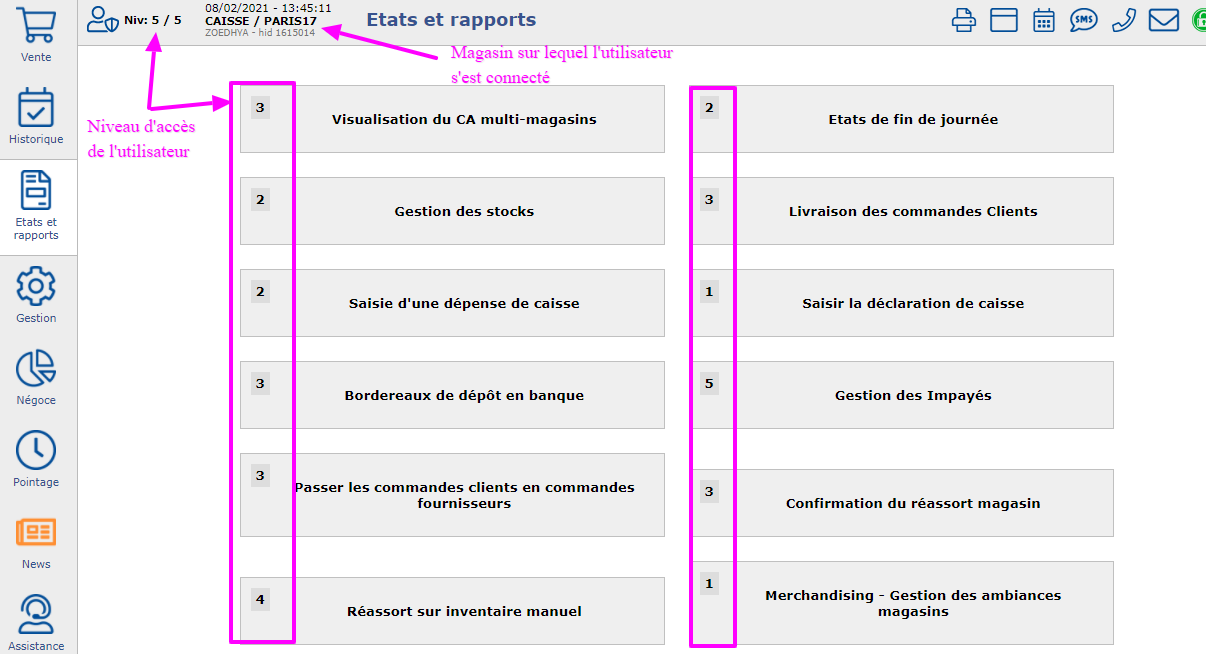
5. Back office menus:
It is possible to navigate between the different menus according to the level of access of the users and their rights. By default, the Management menu is only visible and accessible from level 4 (Inventory Manager).

- Sales menu: collection and actions related to the front office
- History menu: cash register, quote management, sales orders, customer reservations
- Reports menu: Operations related to the back-office, it is a simplified management menu
- Management menu: Stock manager and administrators, settings related to the brand, accounting, inventory procedure, order management etc etc.
- Trade: additional menu licensed for B2B management
- Clocking: attendance management
6. Shortcut buttons in the sales page:
Allows you to create product shortcuts, discount, loyalty, invoice, (management, store settings, shortcut buttons in the sales page)

7. Other Actions menu:

Allows you to create and or sell a gift card, make stock movements, create and or recall baskets etc etc. All this is subject to conditions of a required level of access
The main screen (front office), allows access in one click to the different sections of Fastmag:
The buttons in the purple frame allow you to navigate through the different menus and modules, according to the levels granted (only levels 4 and 5 have access to the management module by default, this is configurable and therefore modifiable):
- Login: to log out and return to the login screen
- Sale: go to the sales screen (the screen shown above)
- History: access to sales history (+ reservations / orders and quotes)
- Reports: access to operational reports and back office functions used in store
- Clocking: User attendance declaration screen
- Management: access to the brand's back office functions, the CRM program, reporting and analysis, and brand configuration
- Trade: access to the Trading module
- News: information, news and tips and tricks about Fastmag
- Assistance: allows you to make a ticket to support, and self-training
The buttons are visible depending on the access settings of the logged-in user.
Similarly, the functions of the "States" menu each require specific levels of access. Thus, a number in front of the menu name indicates the minimum level of access necessary to be able to access it:
When the user needs to access several screens at the same time, it is possible to open several windows or several tabs in parallel. On the other hand, do not use the same login information (sign / store / login / password) if they are requested again, as this would have the effect of disconnecting the user. tutoriel ultra pratique
Was this article helpful?