F - PDA
- 12 May 2023
- 4 Minutes to read
- Print
- DarkLight
- PDF
F - PDA
- Updated on 12 May 2023
- 4 Minutes to read
- Print
- DarkLight
- PDF
Article Summary
Share feedback
Thanks for sharing your feedback!
PDA USER MANUAL
Subject: Use of a PDA (Personal Digital Assistant) to scan products and make inventories, sales, baskets from items scanned with the PDA
1. Configuration in Fastmag
a) Store settings
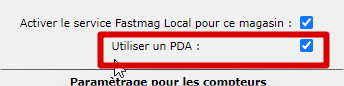
Menu Brand management - Tools and settings - System configuration - Stores - Store configuration
Settings tab:
Check "Use PDA" and save.
This configuration is to be carried out for each store concerned.
Remark:
The use of a PDA in Fastmag is possible in a browser and without using the Fastmag client.
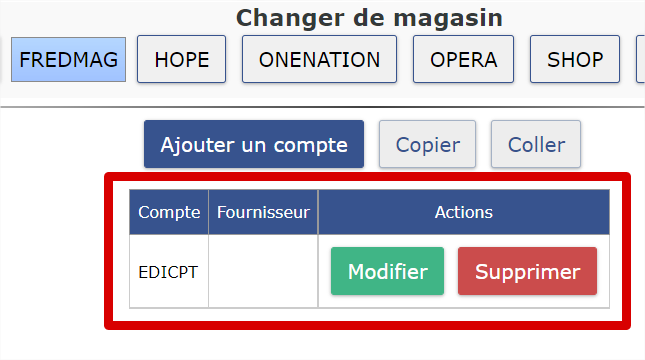
b) Creation of the edi account
Creating an edi account is required to log in to the Fastmag PDA app
Menu Brand management - Tools and settings - System configuration - Security - edi account management
Note:
It is necessary to use our services for the creation of an edi account
c) Creation of an article master for changing packages
If you want to use the PDA to prepare your delivery notes by parcel, it is necessary to create an article sheet without stock management (Family starting with a ~ Tildé) to automate the change of parcels when transferring baskets by parcel.
Creation of an article record.
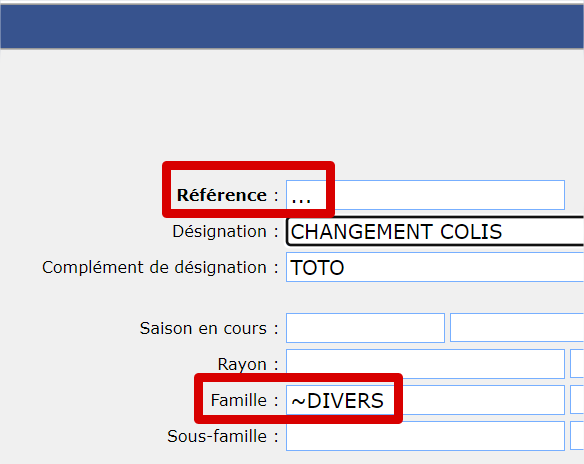
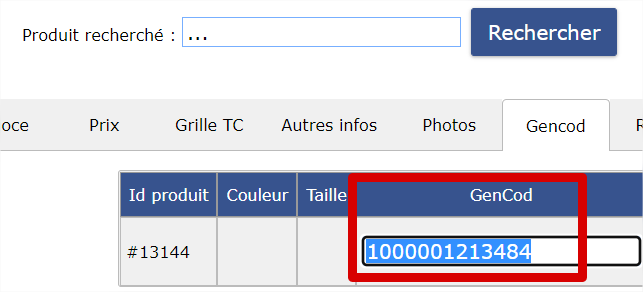
Assign a gencod on the reference
Finally set the package change reference
Menu management sign - folder configuration - trading tab
2. Downloading the android app
Fastmag allows the use of an android PDA player. So you have to start by downloading the application in Google Play
Search for Fastmag PDA and download and install the app on your PDA
Remark:
It is possible to use an android smartphone. However, Fastmag strongly recommends the use of a PDA with a laser barcode reader better suited for quick barcode reading.
3. Launch the Fastmag PDA app
Launch the Fastmag PDA app on your PDA
4. Use of Fastmag PDA
The first time you launch the application, you must fill in the following:
Fastmag server: enter the address of the Fastmag server that hosts you.
Example: opc30 (do not put domain fastmag.fr)
Sign: Indicate the name of your sign
Store: Specify the store code you want to work on.
Edi account: enter the edi account in connection with the store.
Password: Enter the password of the Edi account
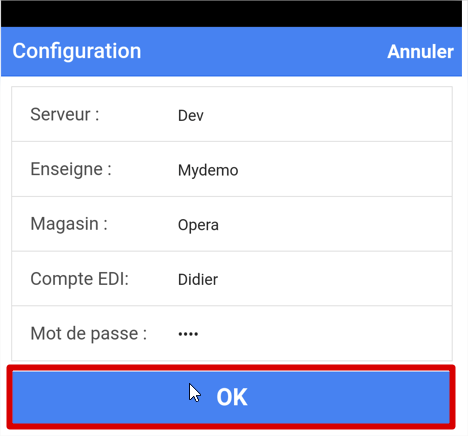
Information click on the OK button
At this time, the application will automatically download all active references in the PDA
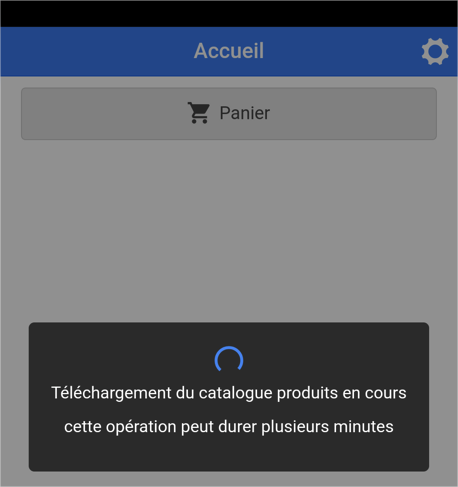
The PDA Menu appears

Choose cart menu
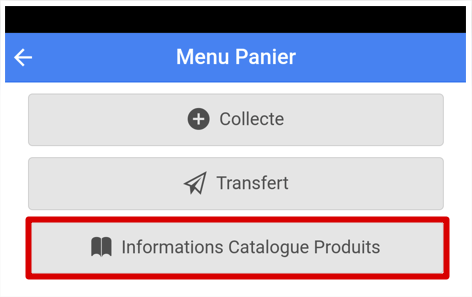
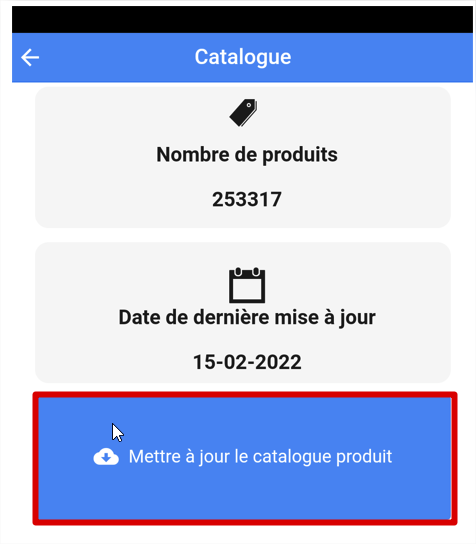
The choice Product catalog information allows you to view the number of references, sizes, colors present in the PDA as well as the date of last update. You can update the product catalog again.
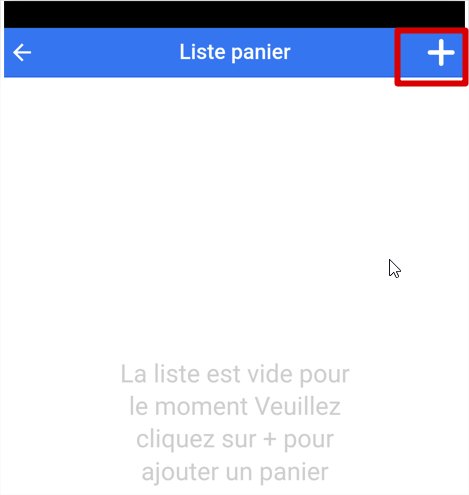
The collection menu allows you to create a basket
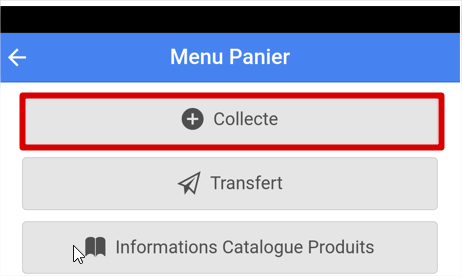
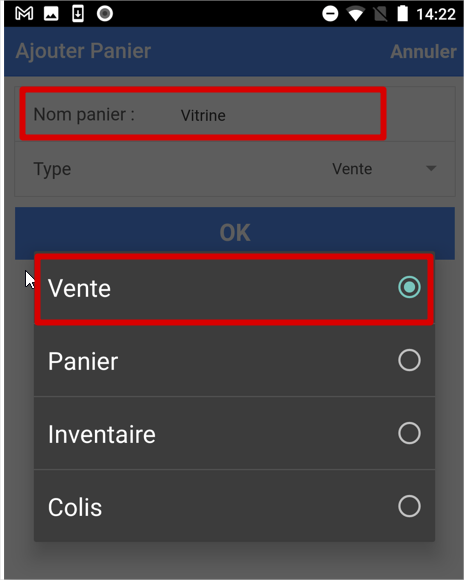
Click more to add a cart
Enter the name of the cart and then the type.
Fill in the type of basket according to its destination:
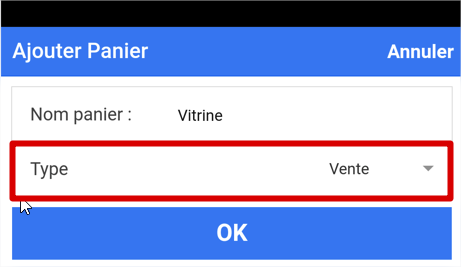
- Sale for shipment in the Fastmag sales screen
- Cart for sending in the Fastmag basket management screen
- Inventory for shipping in the Fastmag inventory screen
- Parcels for shipment in the Fastmag parcel basket management screen (Quantities per item are not grouped by reference).
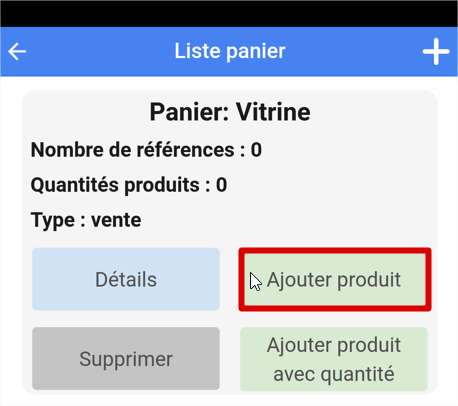
Entering cart contents
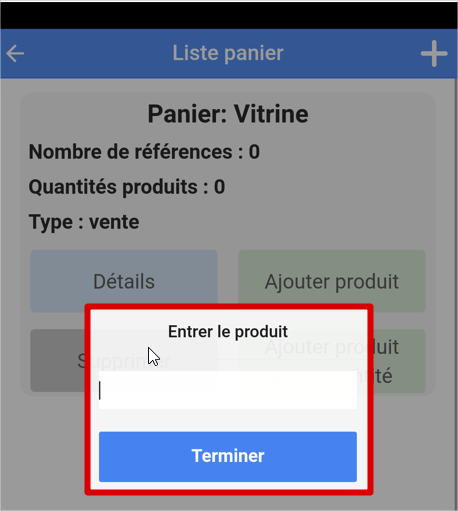
Choose the Add Product menu to scan products
Scan the products in a row and click finish to finish typing.
Remark:
It is possible to scan a gencod, a supplier reference, a pid
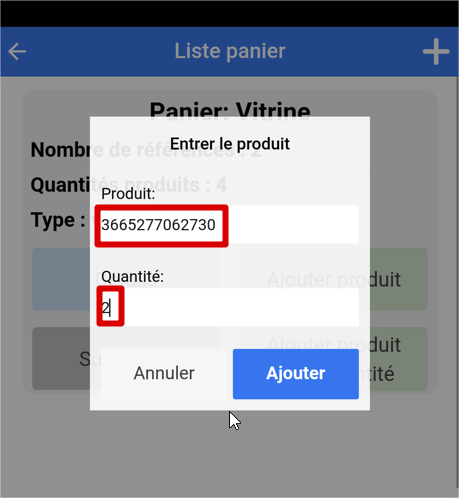
Choose the Add Product with Quantity menu to allow you to enter a quantity after scanning the gencod (or supplier part number or PID) or entering the part number, color, size separated by pipes
Example: BEN| BROWN|38
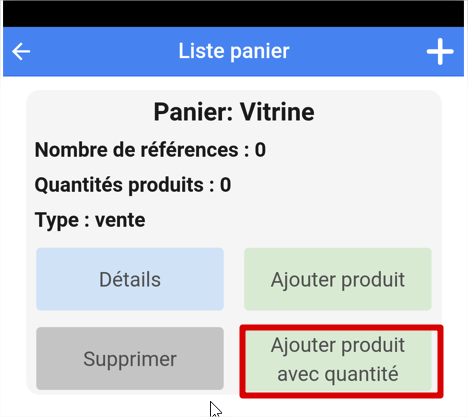
Scan the gencod, enter the quantity and click add
Cart detail
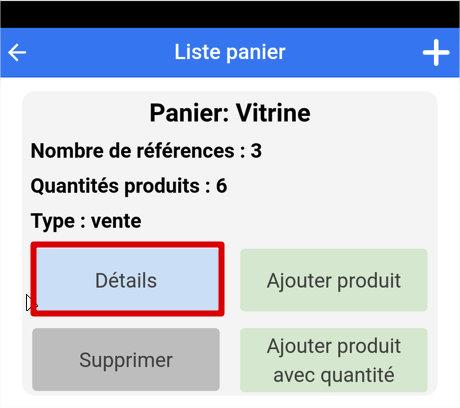
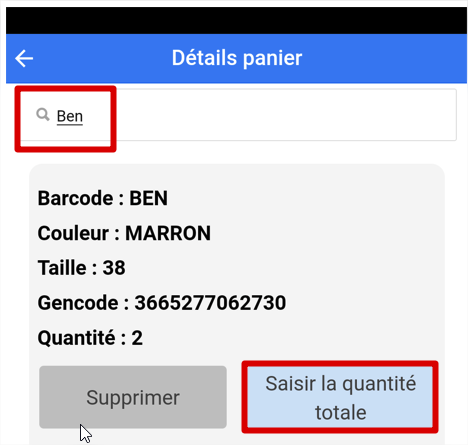
The detail menu allows you to search for a product and optionally modify the quantities of a product.
Enter the reference of the product you are looking for and click the enter total quantity button to change the quantity.
Sending the shopping cart in Fastmag
Go to the cart menu and click on transfer
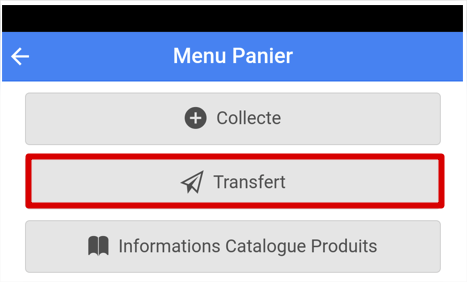
Then click on send on the relevant cart
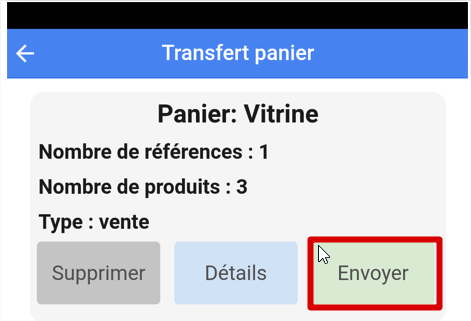
The cart transferred to Fastmag, it is possible to empty the cart in the pda by answering Yes to the question below.
We recommend that you keep the shopping cart until you finish using it in Fastmag

5. Using shopping carts generated by the Fastmag PDA app in Fastmag
a) Display of baskets on the sales screen
Sales Menu
Click the scan button
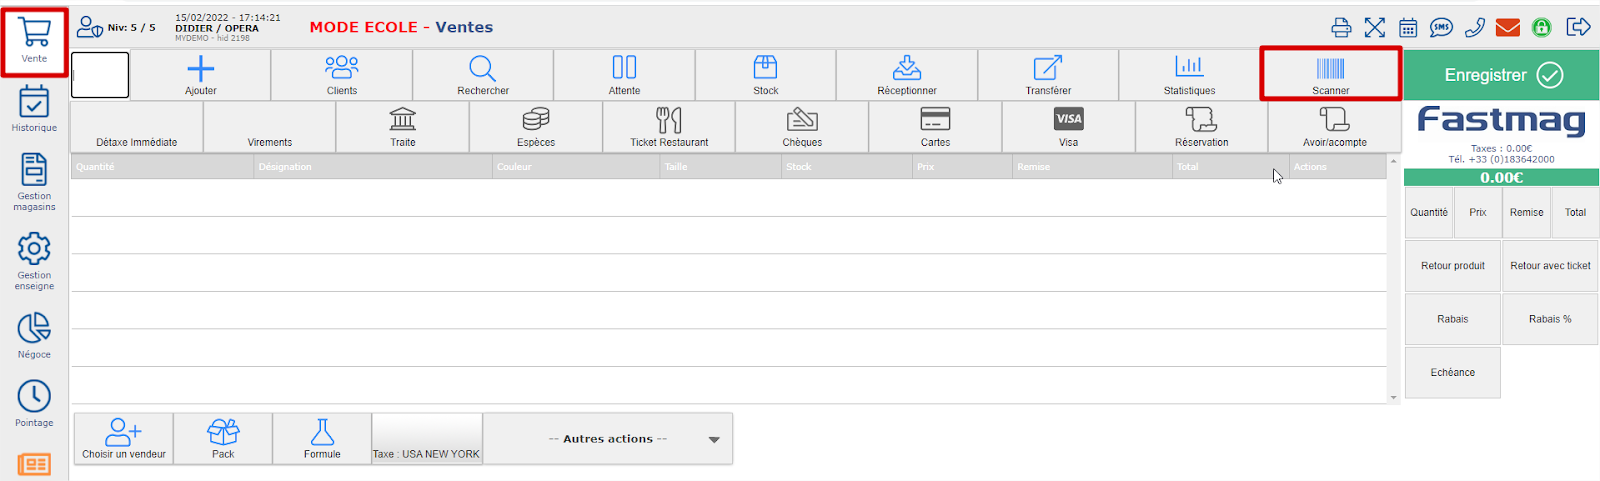
The cart is created in a location with the same name as the cart
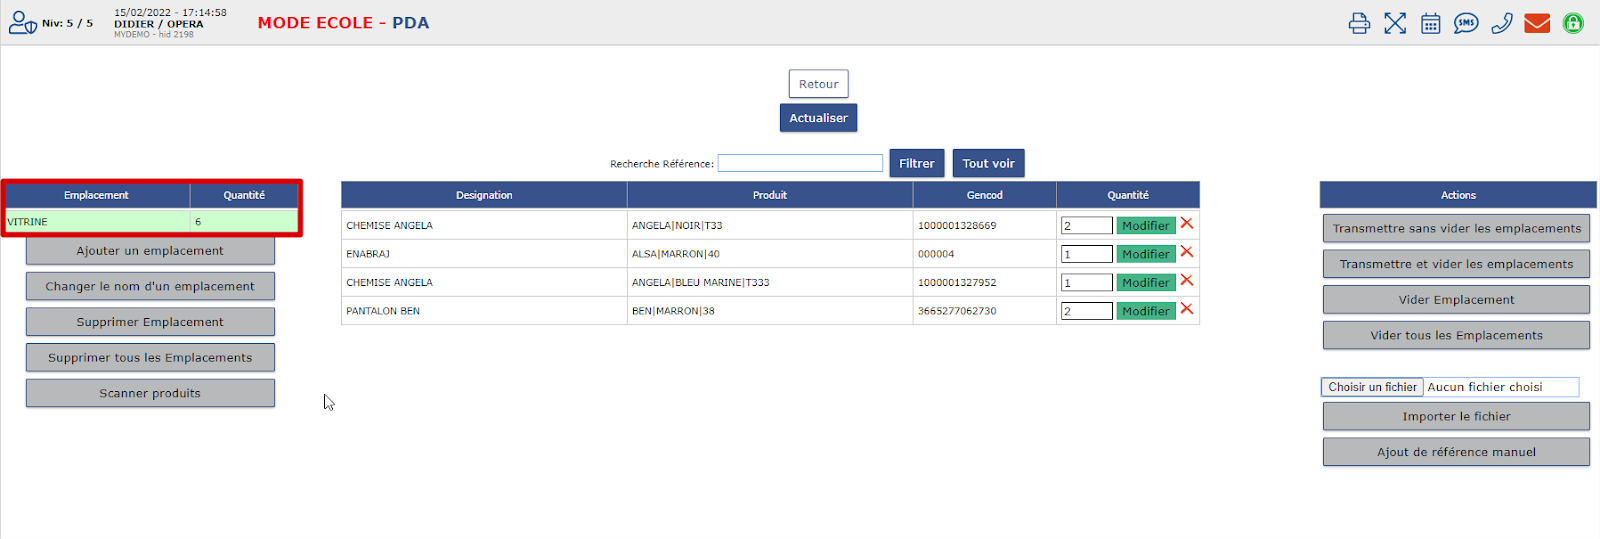
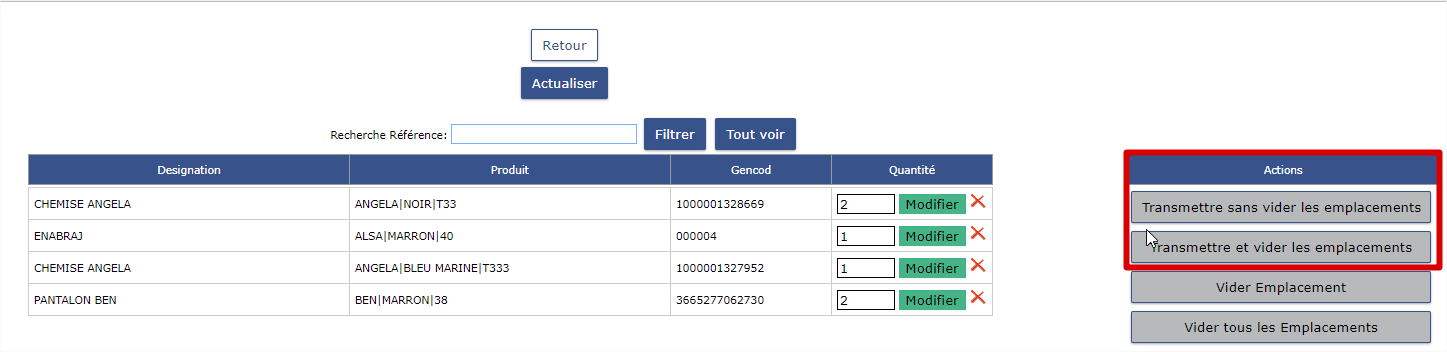
You can transmit the locations in the Fastmag sales screen by emptying them or not according to your choice in the actions menu on the right of the screen
The items and quantities contained in the locations are in sales entry

b) Display of baskets on the inventory screen
Store Management Menu - Store Inventory
After transferring the inventory cart to Fastmag, you can edit the inventory information on the screen below.
Once changes have been made, PDA data must be transmitted to the actual stock inventory
Use the Forward menu without emptying the locations.
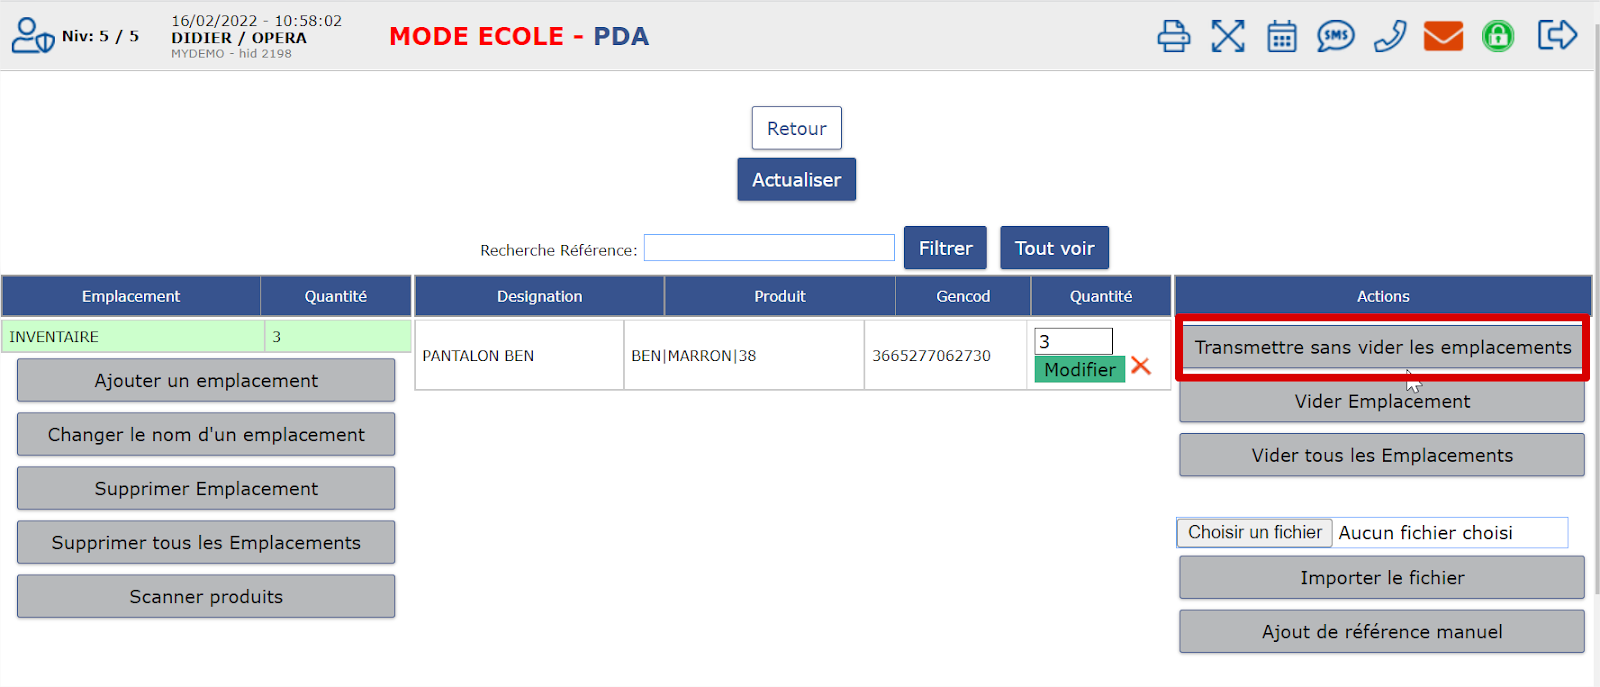
Careful:
Fastmag retains locations for backup purposes. At the beginning of the inventory, it will be necessary to empty all the locations.
c) Display of baskets in the basket management screen
The cart reminder screen is available throughout the Fastmag software by clicking on the cart button
Choose to keep the cart if you wish and then recall the cart
Note:
By default cart reminder deletes cart
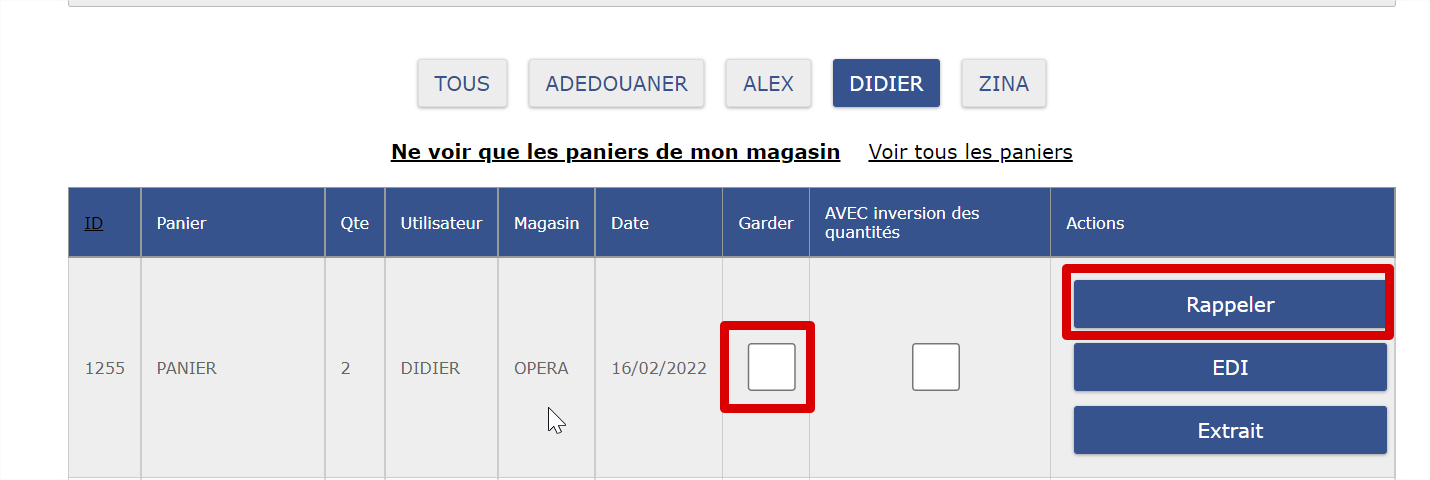
The color size references as well as the quantities will be reminded in Fastmag.
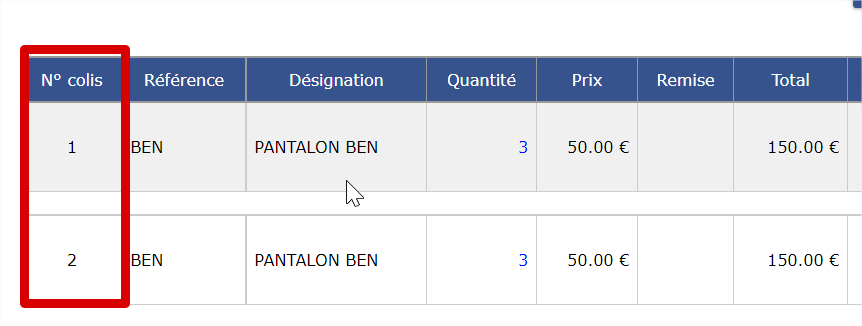
d) Display of baskets per parcel in the basket management screen
The difference between normal baskets and parcel baskets lies in the fact that for parcel baskets Fastmag PDA does not include color size references.
That is to say that if you scan the same barcode several times, there will be no accumulation of quantities on the reference.
To change packages, simply scan the barcode of the item set up in the sign management menu - folder configuration - Trading tab

When recalling basket by parcel, each time the item used to change parcels is detected, Fastmag will change parcels

Note:
By default cart reminder deletes cart
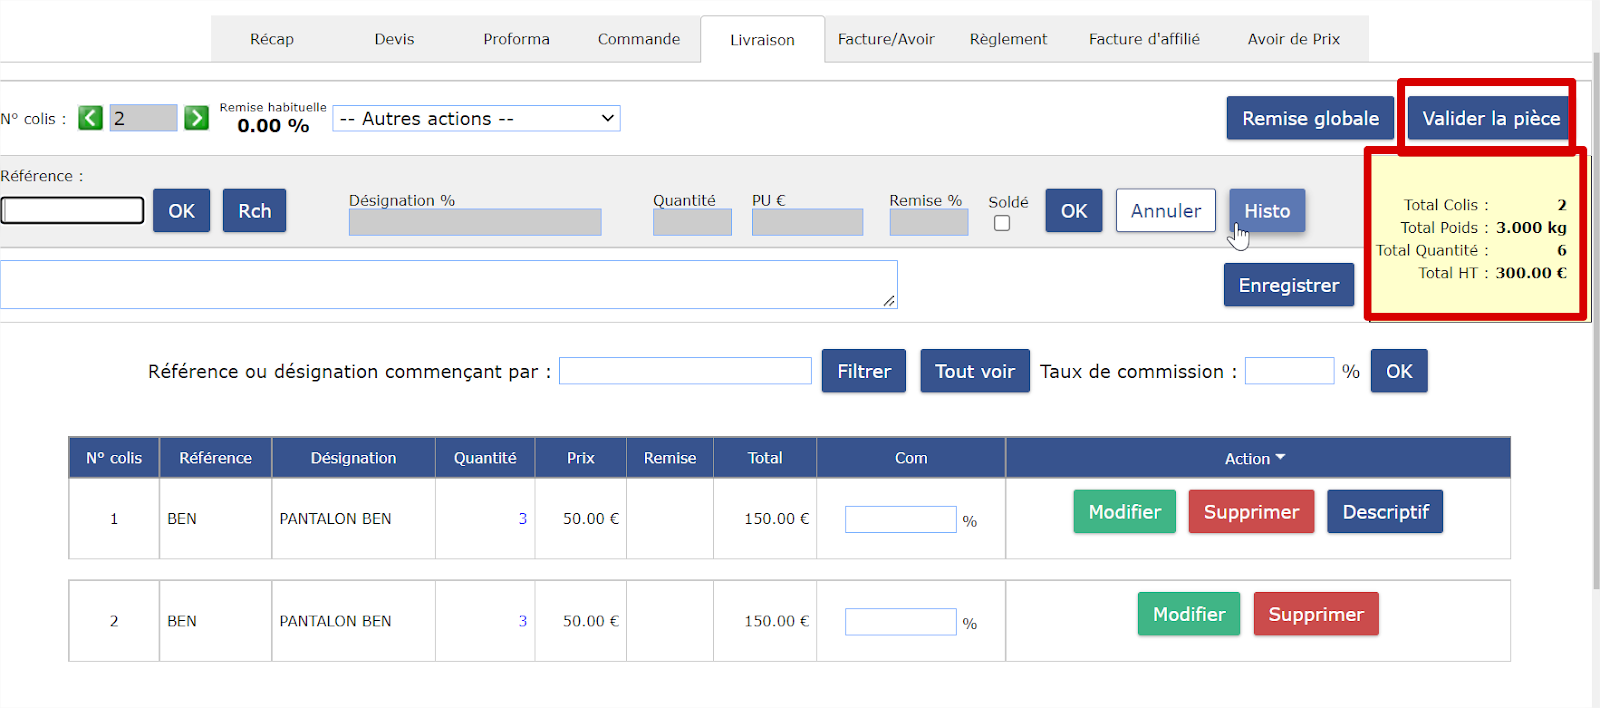
All parcel baskets recalled, validate the commercial part.
To activate the 13th digit on the EAN13 on the HONEYWELL EDA51 PDA you have to go to:
Parameter ==> Honeywell Setting ==> Scanning ==> internal scanner ==> Default profile ==> symbology setting ==> EAN-13 ==> check the box "send check digit"
Was this article helpful?