O - Designer Mode - Advanced Filters
- 19 Apr 2023
- 6 Minutes to read
- Print
- DarkLight
- PDF
O - Designer Mode - Advanced Filters
- Updated on 19 Apr 2023
- 6 Minutes to read
- Print
- DarkLight
- PDF
Article Summary
Share feedback
Thanks for sharing your feedback!
Advanced filters
a - Add/remove filters
1. Add a filter

To add a filter, simply click on the "+" at the top of the filters panel.
A list will then appear on the left, and you can then choose the new field on which you want to filter the dashboard. Once selected, the filter will appear at the bottom of the filter panel, following the existing filters.
2. Remove a filter
 Just as it is possible to add filters, it is also possible to remove them. To do this, simply click on the trash can icon under each filter, and it will disappear from the filter panel.
3. Rename a filter

It is possible to rename the filter by double-clicking on its name, typing the new title and pressing the validation checkmark. We advise you to do this only on the new filters that you add.
Careful!
Although you can delete or rename existing filters, we do not recommend doing so. Indeed, in some cases, this could alter the functioning of the dashboard. This is especially true for locked filters (with a padlock in front of their name).
b - Advanced modification of a filter
As a designer, you have more options when it comes to editing a filter.
- By clicking on the edit pencil you will be able to see on the left side of the filter more options:
- The list, the most commonly used filter,
- The text, which allows you to filter the list on a text criterion,
- The ranking, which allows you to filter the list according to a calculated or uncalculated value,
- Favorites filters, which are custom filters that are quickly re-applicable.
Here we will see how to interact with each of these options in depth. Please refer to the documentation for filters in reader mode before reading this section (filters, text filters, date filters).
1. Change the filter

- List
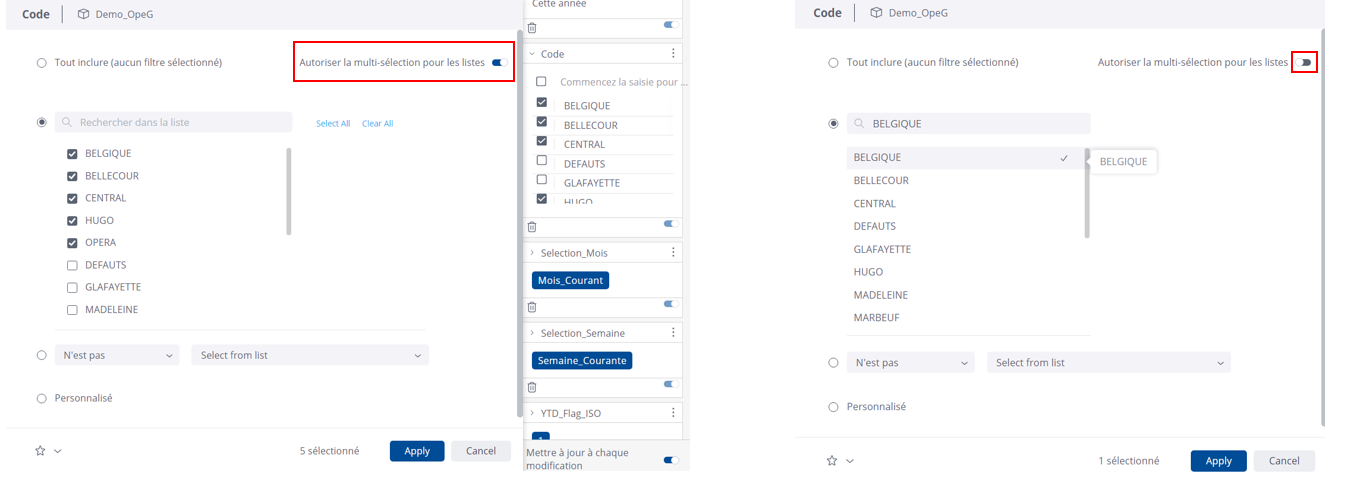
The only option that changes for designer mode is the ability to switch from a list of multiple choices to a list with a single choice by clicking on the small squares next to the filter search bar.
- Filter on text
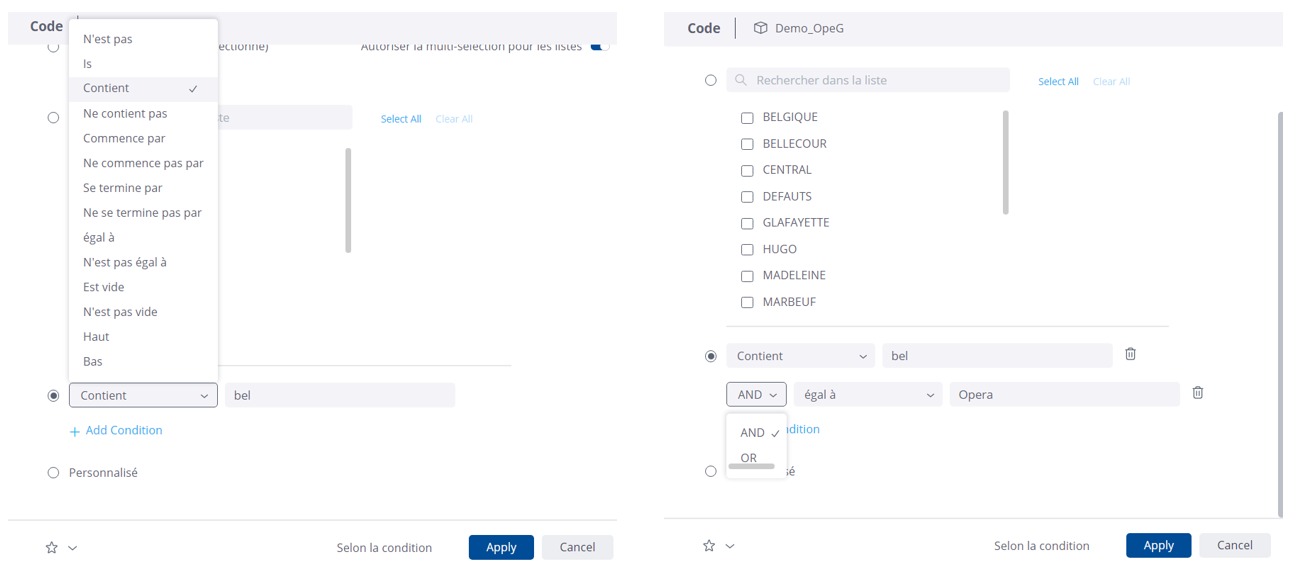
There are several options for filtering text: "starts with", "ends with", "containing", "equal to", "does not start with", "does not end with", "does not contain", "is not equal".
Once the option is chosen, you can type the text you want, and it is also possible to add conditions. By default, these will be cumulative conditions ("OR") but it is possible to transform them into alternative conditions ("OR"). To do this, simply change the "and" to the "or" to the left of the added condition.
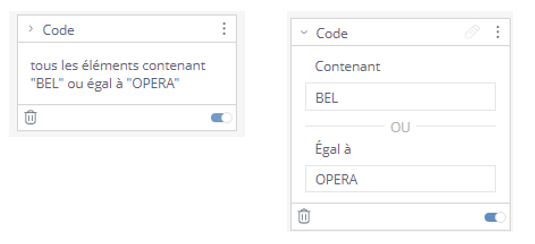
By validating the filter, we obtain the following filter in the filter bar (condensed and complete version):
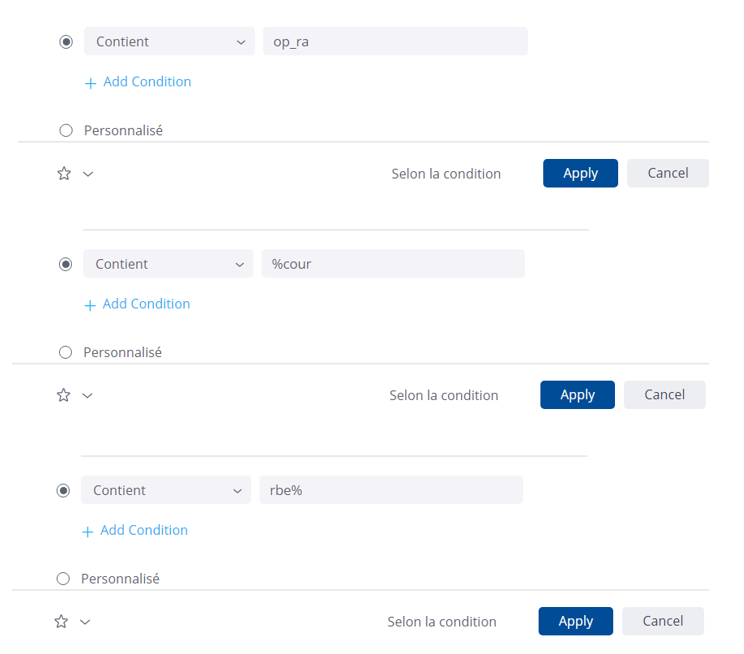
This filter also works with so-called "Wild Cards", for example by replacing an unknown single character with an underscore "_" or a % for a string of characters of undefined length.
- Filter on another field
It is also possible to filter on another field, for example, we are looking here to display the data for the 10 stores with the most CAHT (MtVenteRetailHT). To do this, you must choose the "high" (or "low" options for the bottom of this ranking).
When a numeric field is chosen, the associated formula will always be the total (addition) of the values for each store. On the other hand, it is a text field, the associated formula will be a unique count of the values found, here by store.

Finally, it is possible to insert a more specific formula to achieve this ranking by clicking on the "fx" button in front of the search bar. This will allow you to enter yourself the desired formula to achieve this classification (see formulas).
- Filter a date (advanced)
It is possible to filter a date period thanks to the "advanced" filter option on the filter window.
Let's take the example on the "Date" field. In the "Period" tab, for months, we can find the options "this month", "last month", "last two months", "three months ago", "this month and the next", etc. But these options may not match our filter criteria. It is then possible to use the "Advanced" tab.
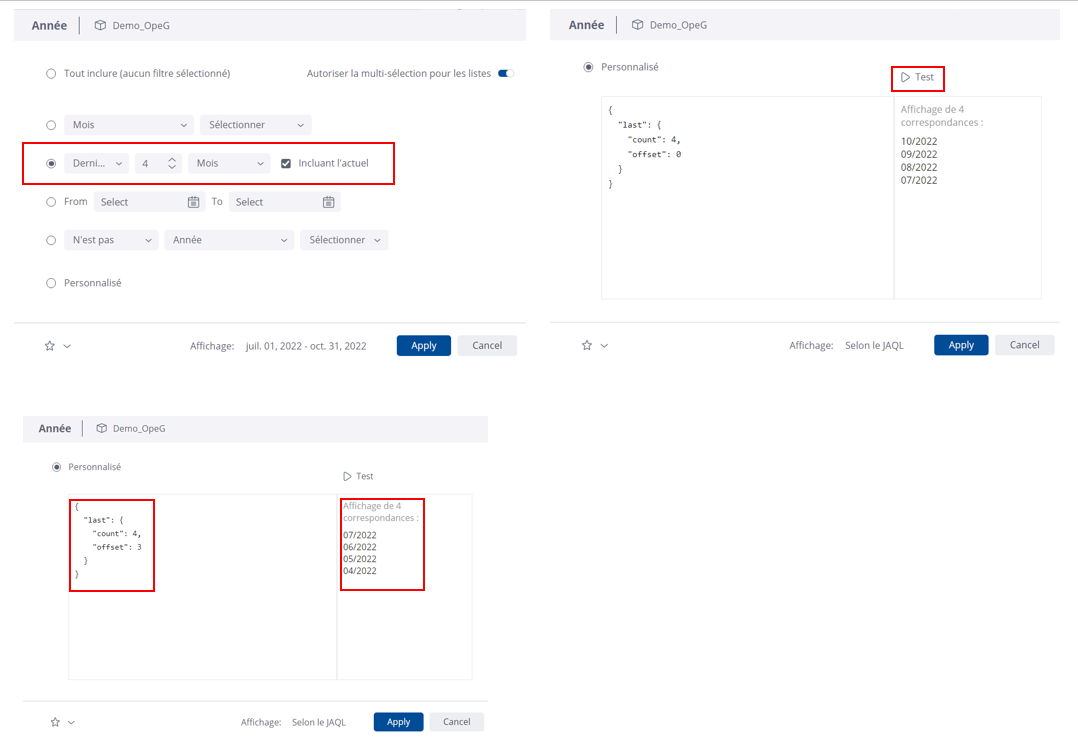
To do this, you must first choose the type of period to filter in the period tab (year, quarter, month, week or day). Then click on "Custom". You will see a screen with the following code and the corresponding month:
{ "last":{ "count": 1, "offset": 0 }}- " Last" refers to the current month ("offset" : 0 being the present month).
- "Count" refers to the number of months included in the filter.
- "Offset" refers to the difference between the current month and the month sought.
Thus, in October 2022, if we want to have a filter over four months three months ago without counting the current one, we will put 4 for count.
Don't forget to click on "test" to check your search results.
The advantage of the filter by period (with or without the advanced option) compared to a filter with fixed dates, is to make this date filter dynamic because the period will automatically change according to the current date.
2. Lock a filter
You can also lock (and unlock) a filter. So when you share your dashboard with other users in reader mode, they won't be able to edit it.
To do this, after making the necessary changes to your filter, click on the filter menu and then click "Lock". A padlock will then appear in front of the name of the filter. To unlock it, click on the three small dots and then on "Unlock".

c - Dependent filters

Dependent filters combine multiple filters from the dashboard into a filter hierarchy, where each filter filters the filter that follows. Thus, when filtering the "parent" filter, fewer options are available in the "child" filter.
In this example, we will limit ourselves to a parent filter and a child filter, but be aware that it is possible to add a "child" filter to the "child" filter already in place.
Let's go back to the example of stores. Each store belongs to a group (shop, corner, depot, eshop or outlet). By creating a group-dependent filter, store codes will be filtered according to the group to which they belong.
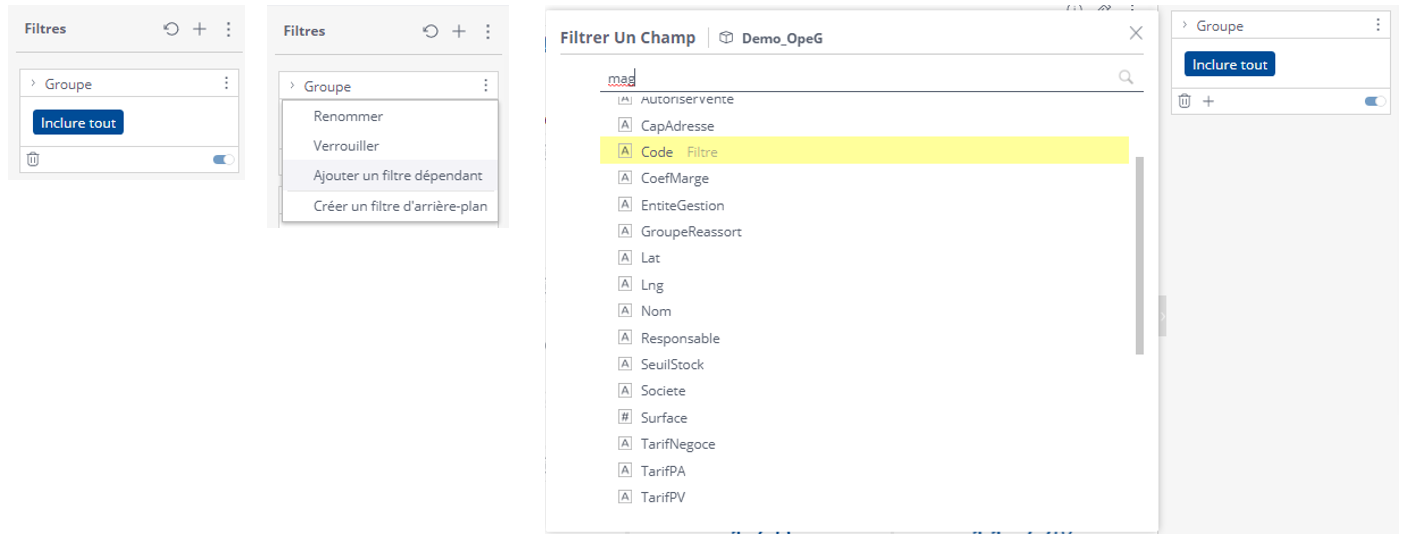
The different steps to create a dependent filter:
- Add the so-called "parent" filter, here Group
- Click on the three small dots at the top of the filter to select the "add a dependent filter" option.
- Select the Code field in the Mag table. You will then get the list of stores.
- Click OK.
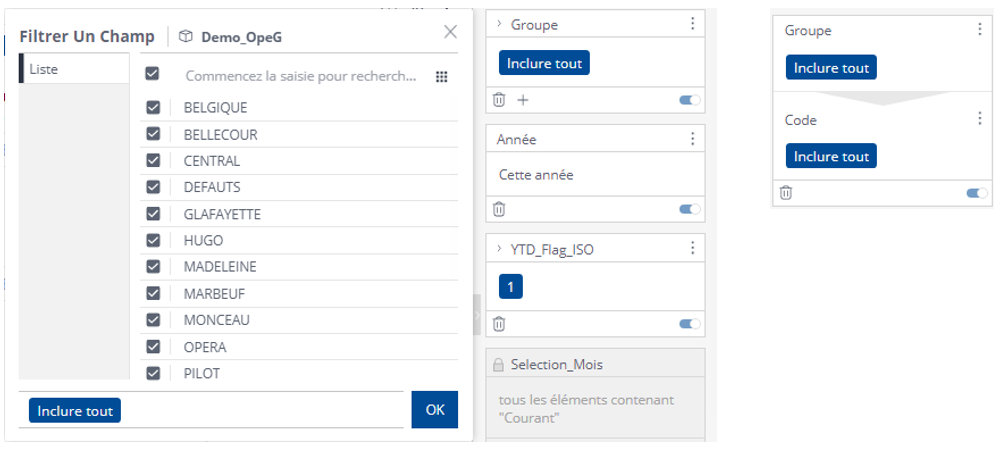
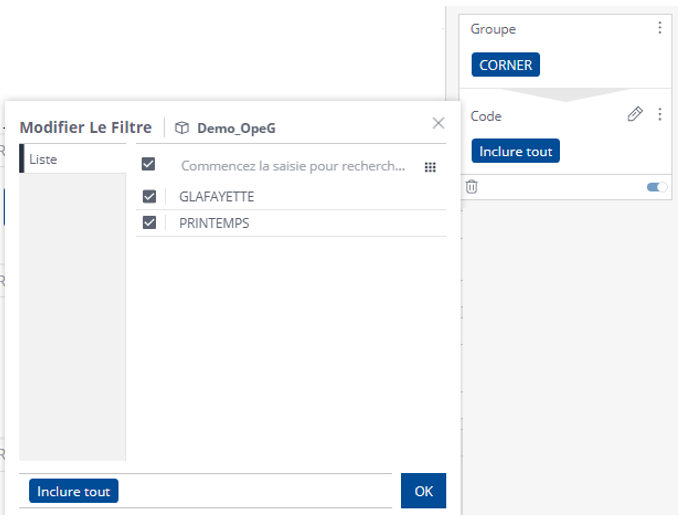
You will then get a dependent combination filter. Thus, by filtering the desired store group, the list of store codes will in turn be filtered according to the group.
d - Background filters
As a Designer, you can also restrict the values of filters themselves so that users can only filter on a defined list of values.
For example, in the family field, in addition to the values "coat", "skirts", "tshirt", etc., there are also values starting with "~" ("~have", "~coupon", "~various"...). Thanks to the background filter, it is possible to pre-filter this field so that the end user no longer sees values starting with "~".

To do this, click on the filter menu, then "Create a background filter". Then choose the values of your filter normally, and then click "OK". You will then see a funnel appear to the left of the filter name, and the values will only display those chosen in the background filter.
 Background filters therefore reduce the data that users will have access to and make it easier for them to use the filters.
e - Table Updatea U on board
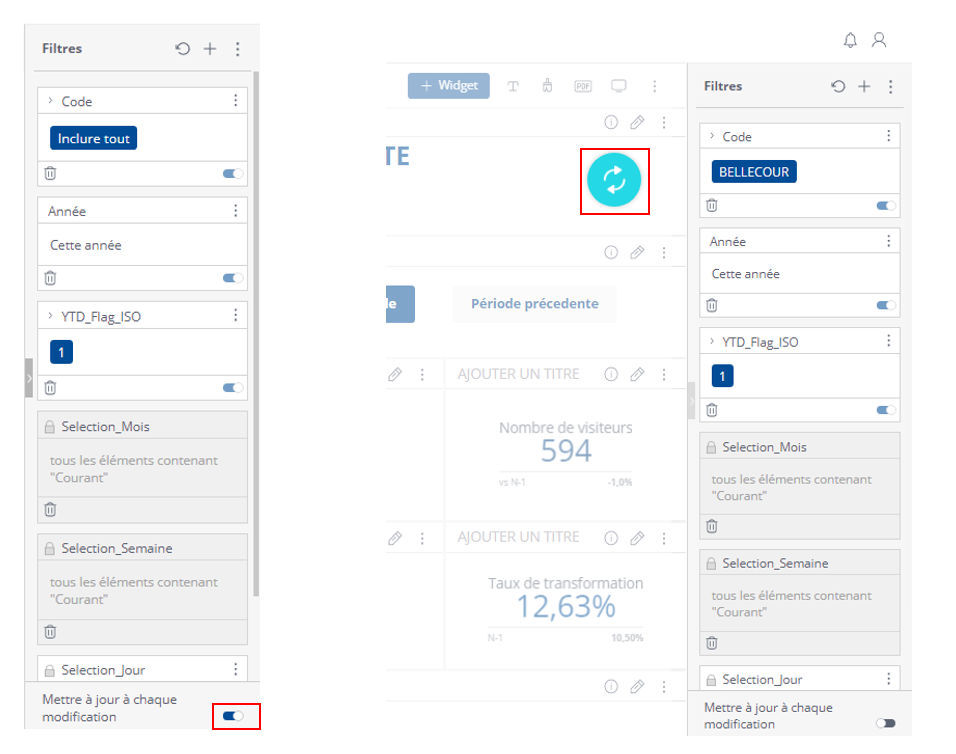
- Update the dashboard every time you change the filter
This option is always selected by default. This is the button at the very bottom right of the filters panel. When this option is selected, the dashboard will refresh immediately after each filter change.
However, it is possible to make the dashboard refresh only once, after the user has made all the desired changes to the filters.
To do this, you must disable the option, modify the filters, and when wanted, click on the blue button that appeared at the top left of the filters. The dashboard will then be updated.
Was this article helpful?